 |
Previous Issues |
| Cedar Mill Community Website |
|
| Search the Cedar Mill News: | About The Cedar Mill News |
April 2010
|
|||||||
| Volume 8, Issue 4 | April 2010 |
||||||
Thinking Forward, Starting Now: Growing your Permaculture Garden
|
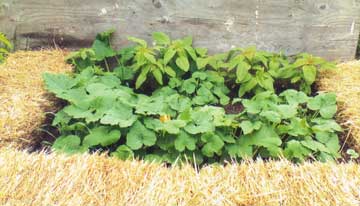 |
Squash and basil growing in a straw-bale bed |
Growing your own food is the first step toward self-sufficiency. It only takes a small garden space to produce a large amount of food and only slightly more space to add in a few chickens for eggs and meat. Fruit trees come in many dwarf and semi-dwarf varieties to fit in just about any space. You can begin to consider the Zone 2 placement of the chickens and fruit trees while preparing your Zone 1 annual vegetable and herb garden beds right now.
I favor no-dig gardening as tilling damages soil structure and brings weed seeds to the surface to germinate. Using these methods generally results in fewer pests and diseases, possibly due to a more balanced soil population (of beneficial micro-organisms, nematodes etc.) being allowed to build up in this comparatively undisturbed environment, and by encouraging the buildup of beneficial rather than harmful soil fungi.
Sheet Mulching is a simple way to build garden beds for your annual vegetables and herbs. It is ideal in that it kills unwanted weed and grass plants while building soil fertility. To start, plot out your garden area, remembering to consider your zones and sectors (see January and February articles).
What you need:
Method:
Start by slashing the weeds or mowing the lawn. Leave the plant material on the ground where it falls.
Soak the cardboard and newspaper in the wheelbarrow until well saturated.
 |
Sheet mulch can be as simple as cardboard topped with a foot of straw, or it can be a more elaborate stack of soil-building layers. |
Sprinkle 1 cup of blood meal, bone meal, or manure per square yard to help break down the organic matter and make it available to worms and plants.
Cover the entire area of the garden with overlapping layers of newspaper 15 sheets thick or cardboard 3 sheets thick, placing them with a 20% overlap. If you are covering an area with particularly difficult invasive weeds make this layer thicker to prevent the germination of seeds.
Add an 8-inch layer of green material such as hay or grass clippings.
Add a 4-inch layer of manure. As the layers break down in a slow cold compost they will provide nutrients for the plants once they become established.
Add a 5-inch layer of well-aged compost.
Top it off with a 2-inch layer of straw. This layer protects the garden bed from temperature extremes and prevents water loss through evaporation.
Move the straw mulch to one side, dig a hole and plant your seedlings or seeds.
 |
Note the stakes that hold the bales in place. Photo by Bruce Bartlett |
Straw Bale Raised Beds are a great option because they are very simple and serve multiple functions, a key permaculture principle. They provide immediate, healthy, low maintenance growing space. At the end of the season, you can simply break them down and sheet mulch the soil and straw into the garden beds. You may end up with surplus straw, in which case you could add it to the compost pile or, if you have chickens, use it for their bedding.
To build them simply place the bales in a square or rectangular shape, leaving one end open. (This makes it easier to run the wheelbarrow in and out, you’ll close it when you’re done.) Drive one stake into the ground on the outside of each bale in the middle to hold them in place. Fill the beds with soil material to the top as it will settle a bit. (I use Natures' Needs compost to fill mine.) Add the last bale when the bed is about 80% full, stake it, fill the rest and you’re ready to go!
Chicken tractors are a useful way of preparing the ground for planting vegetables and herbs. Chickens are very efficient at cultivating soil with their sharp-clawed feet, this action comes naturally to them. While they are digging up everything green they will also be catching bugs and leaving deposits of nitrogen-rich manure. The digging and scratching will incorporate this manure in the soil, so that it will not be laying around on the surface.
What is a Chicken Tractor?
A chicken tractor is a portable hutch that you can easily move about in the garden. If you make it the width of the space between rows, you can start at one end of the row and move along to the end as the chickens do their job. Chickens are very efficient at digging up plants and catching bugs but if you let them loose in the garden they will eat everything, weeds and vegetables.
Construct your chicken tractor from 2” x 2” lumber and chicken wire. It should not be more than three or four feet long and about three feet high. Do not put mesh on the bottom of the tractor, the chickens need to be able to get to the soil. You can make your tractor fancy by including a door in the side to get the chickens in and out more easily but this is not really necessary. Do take the time to make it sturdy, however, so that the chickens are securely confined. An old piece of canvas or burlap can be tacked over the top to give the chickens shade. Always provide a pan of water for the chickens. This can be loose or attached to the tractor.
How to Run Your Chicken Tractor
Put the tractor in the garden where you want the soil to be cultivated and weeds removed. Add the chicken workers, at least three large ones or several banties. The more chickens you put in the tractor, the faster the job will be done. Don’t over-crowd. A little experience and experimentation should soon reveal the optimum chicken-power for the size of your tractor.
The first time you use the tractor, you will have to watch it closely to determine how often it will need to be moved. Once you get a feel for how long it takes your chickens to clear an area, you will be able to go away and leave them alone to do their labor. Just don’t forget about them. Chickens who have removed all edible weeds and bugs from their available space will soon start squabbling amongst themselves. They will also excavate large depressions for dust bathing. You will want to discourage this sort of behavior and encourage good work ethics in your chickens.
Remove the chickens from the tractor at the end of the day and carry them back to their coop for the night. Never leave chickens out all night in a tractor. These portable hutches are so light weight that it will be easy for varmints to tip the tractor over to get to your stalwart chicken employees. You will discover your chickens in small bits and pieces in the morning, it there is anything left but feathers. Chickens like to be in their favorite roost at night. If they are in a strange place it will affect their egg laying, even if raccoons, coyotes or owls do not get them.
Next month will be about companion planting and plant selection as well as organic fertilizers and pest control.
Published monthly by Cedar Mill Advertising & Design
Publisher/Editor:Virginia Bruce
503-629-5799
PO Box 91061
Portland, Oregon 97291